Updates, How-To Articles, Etc.
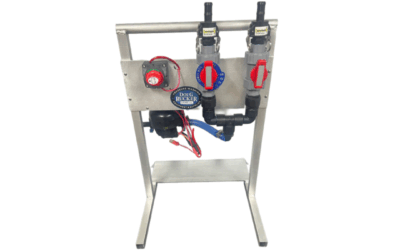
SOFT E SOFT WASH SYSTEM
PORTABLE and LIGHT WEIGHT This Soft E Soft Wash System video from Doug Rucker features and extensive walk through with various gun spray demonstrations. This is the result of many requests for a portable soft wash system. It would need to be small, light weight, and...
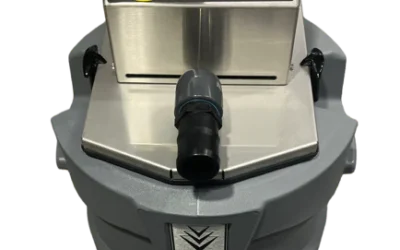
Mississippi Recovery System
NEW ARRIVAL One of the newest products available at Doug Rucker Store is the Mississippi Recovery System. This Karcher product helps keep every job clean and compliant.Instead of letting all that dirty water run off into a drain or across the pavement, this system...
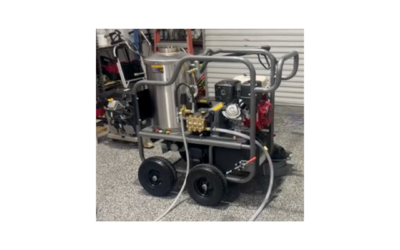
HOW WATER PRESSURE WASHER TRAILER
This HOT WATER PRESSURE WASHER TRAILER video post comes from Doug Rucker Store in Houston, Texas. This is a great little set up that really focuses on a small foot print and portability. It's almost like a hot water pressure washer cart on wheels! It's made to go...
Pressure Washing Business Tips
This is Pressure Washing Business Tips video post is a very different type of video than what Doug normally provides each week. Doug began pressure washing back in the 1980s. He was also managing a sporting goods retail store called "The Athlete's Foot" down at...
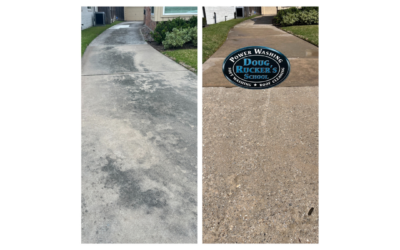
DRIVEWAY CLEANING TIPS
I'm on a residential job today with driveway cleaning tips, along with sidewalks and back patio. So I thought I would pass along a few tips from being on this job site. The first tip is having the owner be prepared for my arrival. This means texting the night...
PRESSURE WASHING NOZZLES
This PRESSURE WASHING NOZZLES video post comes from Doug Rucker Store in Houston, TX. The nozzle setups I share and describe are not necessarily the norm. I first demonstrate the JROD NOZZLE KIT which many are familiar with and use. Another nozzle set up utilizes...